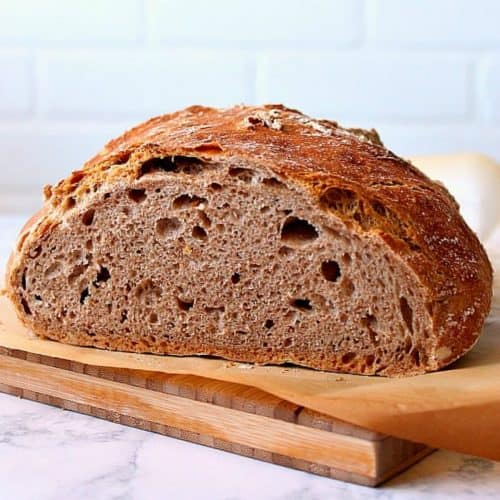
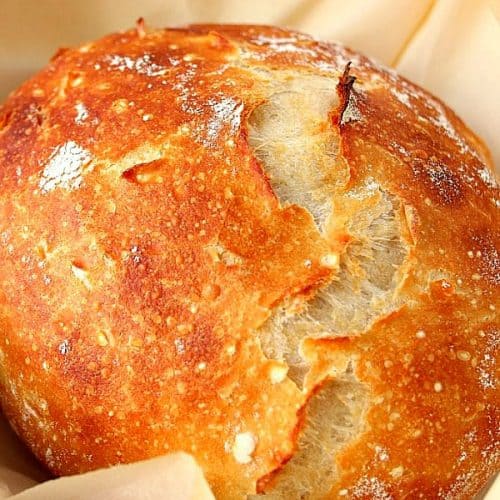
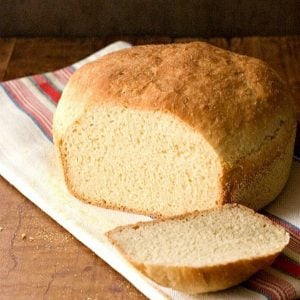
This No-Knead Bread recipe is the best and easiest way to make perfect bread at home! No kneading is needed! This recipe is super easy to follow and makes the best bread loaf at home.

Jump to:
Why This Recipe Works
This bread is exactly what your next sandwich or a steaming bowl of soup needs. A thick slice of home-baked bread. It's simply too easy not to try it. Just stir all of the ingredients in a bowl, cover, and let sit overnight. Next day, bake, slice, and enjoy!
Homemade bread is one of my very favorite things to bake. It's very gratifying and be used for sweet sandwiches (peanut butter and strawberry jelly come to mind) or loaded with cheese and meat, tomatoes, lettuce, and peppers OR dipped into thick tomato soup. By the way, this bread is amazing for grilled cheese sandwiches!
Instructions:
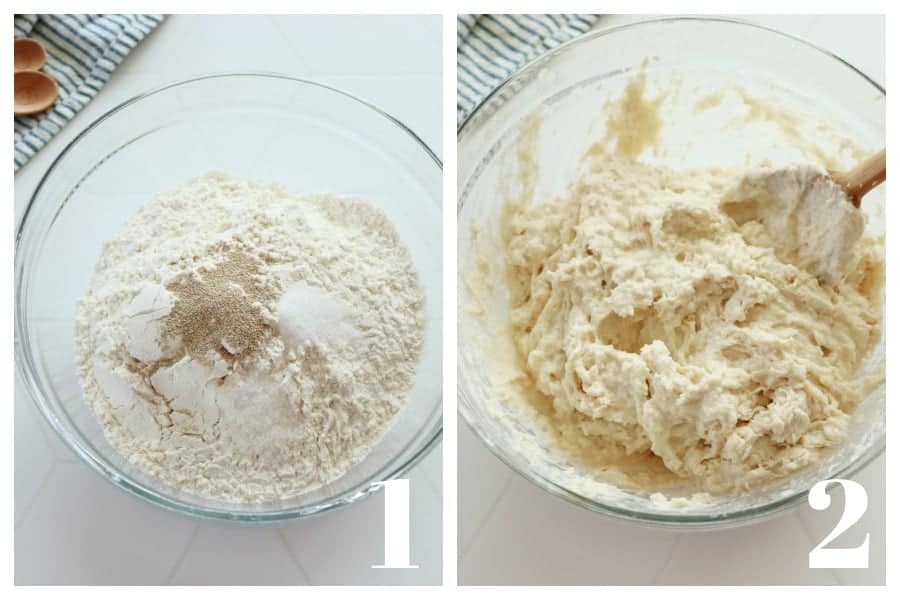
- Start by measuring out the flour by scooping it with a spoon into a measuring cup, then level off the top.
- Combine water, sugar, and yeast in a bowl. Add flour and stir in well.
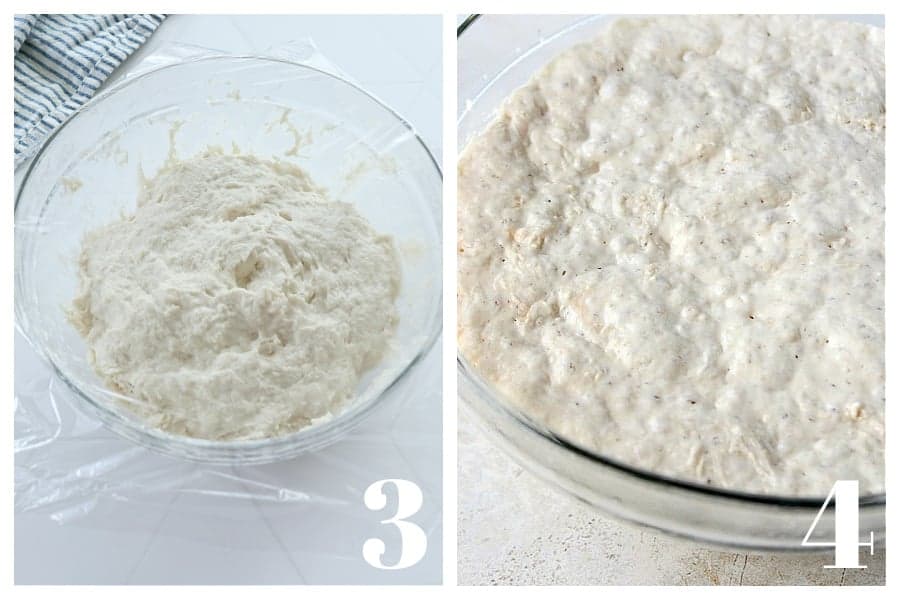
- Cover the bowl and let the dough sit for 24 hours. It should double in size.
- Place dough onto parchment paper, shape into a ball and let sit while you preheat the oven.
- Place dough in Dutch oven and bake, covered, until the top is golden. Remove lid and bake for a few more minutes.
What to use if you don't have a Dutch oven?
If you don't have a cast iron Dutch oven with a lid, you can use a shallow cast iron skillet and a deep cast iron skillet. Use the deep skillet as a lid. The whole setup is heavy so be aware and have kitchen mittens on hand. You need to create a closed environment for the bread to bake with steam.
What size Dutch oven should I use to make this bread?
I've tested this recipe with different sizes of the Dutch oven over the years and anything between 3qt and 5 qt will give you great results. If you want to use a bigger pot, double the recipe. Keep in mind, that if baking the bread in a 3-quart Dutch oven, the bread will have more height, while bread baked in a 5-quart Dutch oven will spread out more.
Can I make this bread with a yeast starter?
The starter, also called levain, is a mixture made with naturally occurring yeast. To make it, you mix flour with water and let it sit letting the yeast and bacteria activate. You can use it in place of yeast in this recipe. Our readers used about ¼ cup of starter to make the no-knead bread and had fantastic results!
Helpful Tips!
- sugar: There are a lot of no-knead bread recipes out there, most of them using only 3 ingredients: flour, yeast, and water. While these ingredients are indeed required, I do not think they will make the best-tasting bread. You need to add sugar to make the yeast happy and bubbling and salt to give the bread flavor. So it's 5 ingredients but the result is the best bread you will make at home.
- flour: Make sure you measure out flour the proper way. Do not dunk the measuring cup into the flour container, but use a spoon to scoop it out into the cup, then level off the top.
- slicing: Cool the bread completely before slicing or you will pull the crumb and the slices won't have the pretty air bubbles.
Variations:
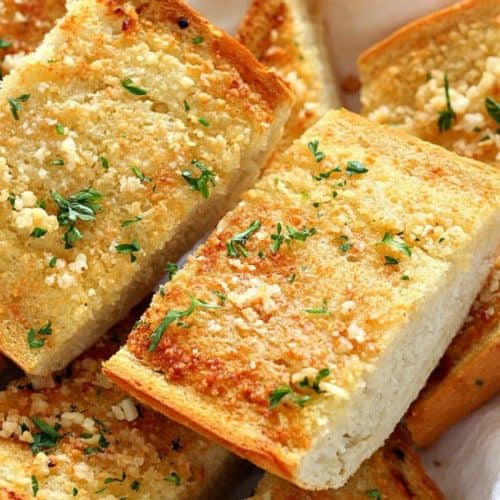
- garlic and herb: add minced garlic and fresh or dried herbs to the dough before rising.
- lemon and garlic: add citrus zest and minced or roasted garlic to the dough before rising.
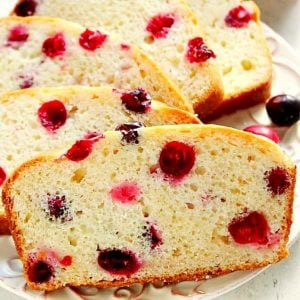
- cranberries and nuts: add dried cranberries (or any fruit) and chopped nuts to the dough before rising. Orange zest would be great too!
Recipe FAQs:
Yes, honey or maple syrup can be used in place of sugar.
A dough made with active dry yeast rises slower, hence the overnight step. If you are using instant yeast, you can cut the rising time to even 2 hours. Watch the dough if it doubles in size. You will also need to use more of it, I suggest 1 teaspoon of instant yeast. The bread will taste the same, but the crumb won't have as many holes.
If the dough doesn't double in size after the rising time, it means the yeast is old and it didn't activate. Start over with a fresh batch of yeast. Also, make sure you measure out the flour properly.
Yes, bread flour or all-purpose flour can be used.

More easy bread recipes:

If you like this recipe and make it, let me know in the comments below! Don't forget to rate it if you enjoyed it!
No-Knead Bread
Ingredients
- 3 cups all-purpose flour
- 1 ½ teaspoons salt
- ¼ teaspoon granulated sugar
- ½ teaspoon active dry yeast
- 1 ½ cup warm water
Instructions
- In a large mixing bowl, stir together flour, sugar, salt and yeast. Add water and stir just until incorporated. Do not overmix. The dough will be shaggy (wet and sticky, not smooth).
- Cover the bowl with plastic wrap and let sit on the counter, at room temperature for 8 to 24 hours. The dough will rise and have lots of air bubbles.
- The next day, lightly flour a piece of parchment paper. Sprinkle a little bit of flour ( a tablespoon or two) on the surface of the dough. Using the bowl scraper, remove the dough from bowl and place it onto the parchment paper. With floured hands or the bowl scraper, shape into a ball, by tucking the sides of the dough underneath it.
- Preheat oven to 450° F. Adjust rack to lower position. Place Dutch oven inside. Preheat for 30 minutes.
- When oven is ready, make a cut in the center of the dough with a sharp knife and carefully place the parchment paper with dough inside the Dutch oven. Add two ice cubes to the Dutch oven (in between the parchment and the side of the pot). Cover with Dutch oven lid and bake for 30 minutes. Remove lid and bake for 10 to 15 minutes OR until the top is golden brown.
- When the timer is up, carefully remove Dutch oven from oven. Remove parchment paper with bread and place on a wooden cutting board. Let cool completely before slicing.
Notes
- To measure out flour the proper way: do not dunk the measuring cup into the flour container, but use a spoon to scoop it out into the cup, then level off the top.
- If you are not sure if your yeast is still good, dissolve ¼ of a teaspoon of it in ½ cup of warm water. If it foams up, your yeast is still good!
- Cool the bread completely before slicing or you will pull the crumb and the slices won't have the pretty air bubbles.
- I use a silicone bowl scraper to handle a sticky dough like this one. You can purchase it on Amazon or any store.
- Please note, that the nutrition value can vary depending on what product you use. The information below is an estimate. Always use calorie counter you are familiar with.
Joe P. says
I like it. But I must admit that this is the first bread I've made outside of a bread machine. Most of the bread machine results received sympathy thumbs up. They often came out dense and with a texture that seemed lacking.
This recipe has had great results as far as flavor and an equaled desire to consume it. I've changed the recipe a couple times to see what would happen and the results again were good, but I will keep this recipe as a go-to since it's so simple. Thanks for supporting my novice interests.
Anna says
That's fantastic! I am always happy to see how our readers experiment with the recipes. So glad you enjoyed the results! Thank you so much, Joe!
Sandy Stoffel says
I am Old School I like to Print My Recipes! I am New to making my Bread. I was able to Print the Recipe! But Was the Most Important I Couldn't PRINT the Helpful Hints, Variations.
I Want to Print the Helpful Hints and Vairations!!!!!!!!!!!!!!!!!!!!
The Difference in Yeast this I dont Understand! How to Freeze is IMPORANT.
Being a 2 Person Family! I have a Dutch Oven!
I am 62 yrs old. I grew up with 13 brothers and sisters and my Husband had 18 brothers and sisters. We both grew up and butchered our Meat and Chickens but I Never learned how to Make Bread. LOL to many Kids, had to clean and make meals!
Sorry so windy But I Hate that things aren't easier for People Like Me that aren't good with Electronics My Work History is Building Mobile homes, Engine Valves and Combines, so I am Lost Doing This Kind of Stuff.
IF YOU COULD EMAIL ME HOW TO PRINT THE VARATIONS AND HELPFUL HITS I WOULD APPRICATE SO SO MUCH . MY NAME IS SANDY
Anna says
Hi Sandy! I emailed you all the tips and variations. I hope it helps!
Belle says
Wonderful!!
Erlene Johnson says
Everytime I make this bread it's burnt on the bottom real bad and always hard as a rock
Linda Zastawnik says
Can this be made in a 10" cast-iron skillet with a lid instead of Dutch oven?
Eva says
My Dutch oven says not to preheat empty. What do you suggest?
Carol Reinhart says
I put several inches of water in the Dutch oven while preheating. Be careful pouring it out when ready to bake the bread as it will be boiling.
Kathy says
I made it with craisins and almond flavoring, then glazed with an almond glaze. Outstanding dessert bread!
Marcy h says
I don't have a dutch oven either. Would a high sided corning ware dish with a lid work?
Nancy says
Made this today and it was awesome. I’ve had rotor cuff surgery both arms and this is so much easier .
I am going to visit my Granddaughters for Christmas and going to teach them.
I like the comment about using starter instead of yeast . Thank you!
William says
Best sensible No-Knead recipe I've tried and it's delicious. Thank you.
Deb says
Excellent easy recipe. I’m amazed at the wonderful taste with so little effort.
Diane says
I have made this 3 times. This last time my dough was very wet and sticky. Couldn’t get it to form a ball. Yeast I used was brand new, fresh date. I measured flour exactly. What could have happened?
Sheila says
All you need to do is add more flour, one tablespoon at a time until it is less wet and sticky. Even wet and sticky it will bake just fine but will be a bit more dense.
Jennifer Boyd says
This bread was incredibly easy and delicious. Will definitely bake it again!
Anna says
Thank you so much, Jennifer!
Christine says
How is the bread different when left to rise only 8 hours as opposed to overnight/for a day? I've only ever made it with a whole day rise, but my daughter just made it with an 8 hour rise. It looks the same - fantastic and she is giving it away so we won't know what it looks like inside or how it tastes. Hence, my question,
Tiana says
The longer you let it rise (up to 5 days in the fridge), the more it will taste like sourdough. The longer the rise deeper the flavor.
Linda Wilson says
It didn't rise at all. The yeast was new so it can't be that. I put it in the oven with the light on. Would that make it too hot to rise??
I have made regular bread before and have never had this issue.
I also put the plastic wrap on tight and then put a tea towel over that.
TT says
It happens that even with "new" yeast, the yeast is not good.
You can test your yeast very easily.
Get a glass measuring cup.
Fill it to 1/3 cup with nicely warm water. How warm? Use your hand as the water comes from the faucet. If it feels warm or quite warm, but NOT hot, then that's the warm we need.
Add 1 teaspoon of sugar, stir to dissolve.
Add 1 teaspoon active dry yeast. If you're using "cake"/fresh yeast, then use the equivalent to 1 tsp of active dry yeast.
Let the yeast dissolve for a around 15-20 seconds. Once all of the yeast gets hydrated, mixing it into the water will be easy. You can use a small whisk if needed.
Let the mixture sit.
Check it 10 minutes later.
If you see a nice foamy "head" with lots of bubbles, then your yeast is alive and well. Take a nice smell of it. Smelling bloomed/proofed yeast will let you know what wonderful aroma little yeast farts and belches give, and that adds wonderful flavor to bread and other baked goods using yeast.
If all you see is what it looked when you stirred in the yeast 10 minutes ago, then you need new yeast, cause that yeast is no longer alive and well.
Rosa says
Made this today and am in love with it. My question is can I use bread flour ? The center is dense which is fine but we like a lighter center. Thank you
Tony says
I used bread flour and it came out perfectly.
Irene scott says
Without using a sourdough starter, why is this described as a dough bread recipe? I’m a newby to bread baking so I appreciate your clarification!
Thank you
Anna says
Hi Irene! You can certainly use a starter if you like. I like the simplicity of this recipe. That is the whole point.