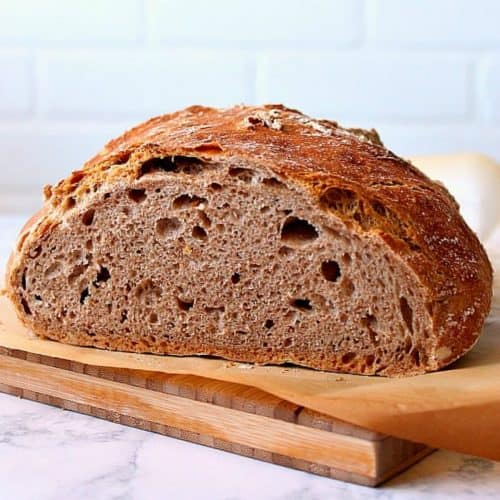
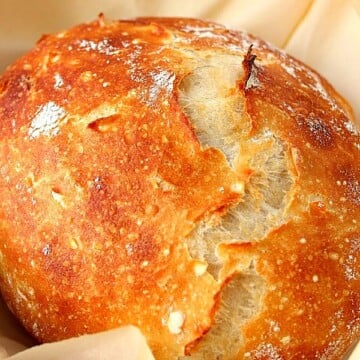
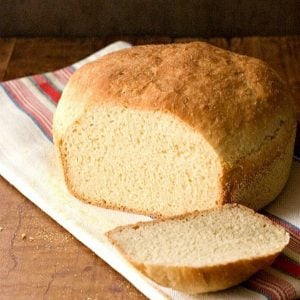
This No-Knead Bread recipe is the best and easiest way to make perfect bread at home! No kneading is needed! This recipe is super easy to follow and makes the best bread loaf at home.

Jump to:
Why This Recipe Works
This bread is exactly what your next sandwich or a steaming bowl of soup needs. A thick slice of home-baked bread. It's simply too easy not to try it. Just stir all of the ingredients in a bowl, cover, and let sit overnight. Next day, bake, slice, and enjoy!
Homemade bread is one of my very favorite things to bake. It's very gratifying and be used for sweet sandwiches (peanut butter and strawberry jelly come to mind) or loaded with cheese and meat, tomatoes, lettuce, and peppers OR dipped into thick tomato soup. By the way, this bread is amazing for grilled cheese sandwiches!
Instructions:
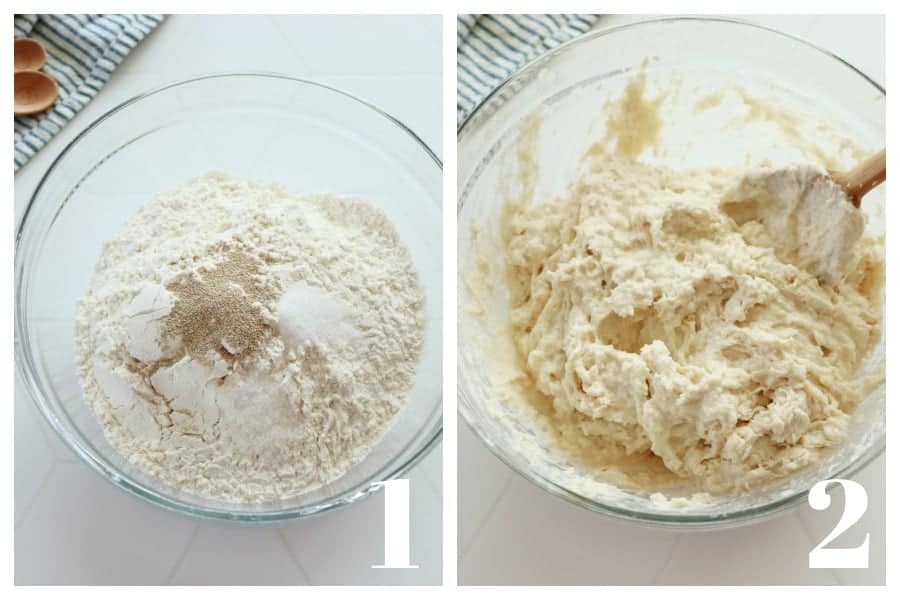
- Start by measuring out the flour by scooping it with a spoon into a measuring cup, then level off the top.
- Combine water, sugar, and yeast in a bowl. Add flour and stir in well.
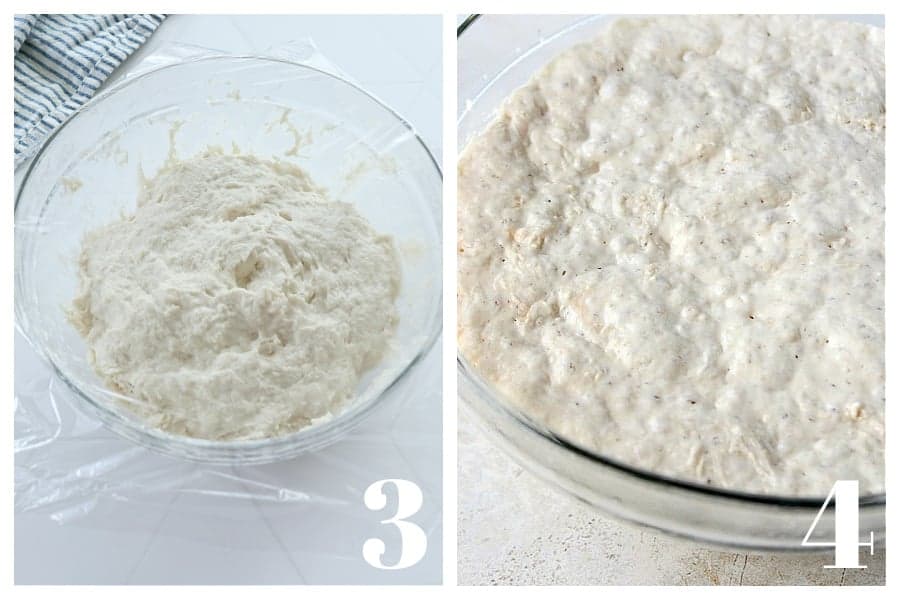
- Cover the bowl and let the dough sit for 24 hours. It should double in size.
- Place dough onto parchment paper, shape into a ball and let sit while you preheat the oven.
- Place dough in Dutch oven and bake, covered, until the top is golden. Remove lid and bake for a few more minutes.
Would you like to save this recipe?
What to use if you don't have a Dutch oven?
If you don't have a cast iron Dutch oven with a lid, you can use a shallow cast iron skillet and a deep cast iron skillet. Use the deep skillet as a lid. The whole setup is heavy so be aware and have kitchen mittens on hand. You need to create a closed environment for the bread to bake with steam.
What size Dutch oven should I use to make this bread?
I've tested this recipe with different sizes of the Dutch oven over the years and anything between 3qt and 5 qt will give you great results. If you want to use a bigger pot, double the recipe. Keep in mind, that if baking the bread in a 3-quart Dutch oven, the bread will have more height, while bread baked in a 5-quart Dutch oven will spread out more.
Can I make this bread with a yeast starter?
The starter, also called levain, is a mixture made with naturally occurring yeast. To make it, you mix flour with water and let it sit letting the yeast and bacteria activate. You can use it in place of yeast in this recipe. Our readers used about ¼ cup of starter to make the no-knead bread and had fantastic results!
Helpful Tips!
- sugar: There are a lot of no-knead bread recipes out there, most of them using only 3 ingredients: flour, yeast, and water. While these ingredients are indeed required, I do not think they will make the best-tasting bread. You need to add sugar to make the yeast happy and bubbling and salt to give the bread flavor. So it's 5 ingredients but the result is the best bread you will make at home.
- flour: Make sure you measure out flour the proper way. Do not dunk the measuring cup into the flour container, but use a spoon to scoop it out into the cup, then level off the top.
- slicing: Cool the bread completely before slicing or you will pull the crumb and the slices won't have the pretty air bubbles.
Variations:
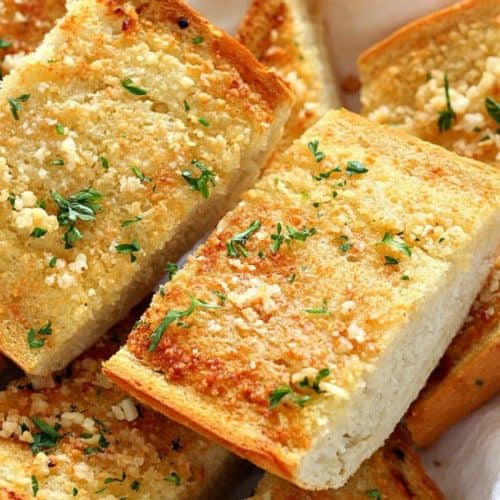
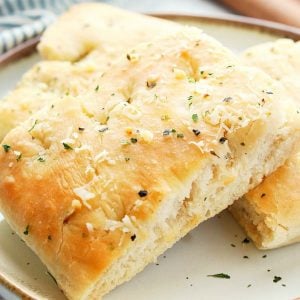
- garlic and herb: add minced garlic and fresh or dried herbs to the dough before rising.
- lemon and garlic: add citrus zest and minced or roasted garlic to the dough before rising.
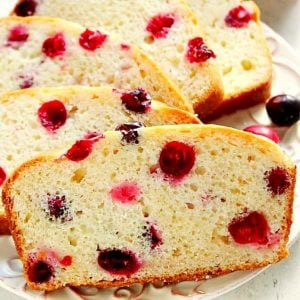
- cranberries and nuts: add dried cranberries (or any fruit) and chopped nuts to the dough before rising. Orange zest would be great too!
Recipe FAQs:
Yes, honey or maple syrup can be used in place of sugar.
A dough made with active dry yeast rises slower, hence the overnight step. If you are using instant yeast, you can cut the rising time to even 2 hours. Watch the dough if it doubles in size. You will also need to use more of it, I suggest 1 teaspoon of instant yeast. The bread will taste the same, but the crumb won't have as many holes.
If the dough doesn't double in size after the rising time, it means the yeast is old and it didn't activate. Start over with a fresh batch of yeast. Also, make sure you measure out the flour properly.
Yes, bread flour or all-purpose flour can be used.

More easy bread recipes:

If you like this recipe and make it, let me know in the comments below! Don't forget to rate it if you enjoyed it!
No-Knead Bread
Ingredients
- 3 cups all-purpose flour
- 1 ½ teaspoons salt
- ¼ teaspoon granulated sugar
- ½ teaspoon active dry yeast
- 1 ½ cup warm water
Instructions
- In a large mixing bowl, stir together flour, sugar, salt and yeast. Add water and stir just until incorporated. Do not overmix. The dough will be shaggy (wet and sticky, not smooth).
- Cover the bowl with plastic wrap and let sit on the counter, at room temperature for 8 to 24 hours. The dough will rise and have lots of air bubbles.
- The next day, lightly flour a piece of parchment paper. Sprinkle a little bit of flour ( a tablespoon or two) on the surface of the dough. Using the bowl scraper, remove the dough from bowl and place it onto the parchment paper. With floured hands or the bowl scraper, shape into a ball, by tucking the sides of the dough underneath it.
- Preheat oven to 450° F. Adjust rack to lower position. Place Dutch oven inside. Preheat for 30 minutes.
- When oven is ready, make a cut in the center of the dough with a sharp knife and carefully place the parchment paper with dough inside the Dutch oven. Add two ice cubes to the Dutch oven (in between the parchment and the side of the pot). Cover with Dutch oven lid and bake for 30 minutes. Remove lid and bake for 10 to 15 minutes OR until the top is golden brown.
- When the timer is up, carefully remove Dutch oven from oven. Remove parchment paper with bread and place on a wooden cutting board. Let cool completely before slicing.
Notes
- To measure out flour the proper way: do not dunk the measuring cup into the flour container, but use a spoon to scoop it out into the cup, then level off the top.
- If you are not sure if your yeast is still good, dissolve ¼ of a teaspoon of it in ½ cup of warm water. If it foams up, your yeast is still good!
- Cool the bread completely before slicing or you will pull the crumb and the slices won't have the pretty air bubbles.
- I use a silicone bowl scraper to handle a sticky dough like this one. You can purchase it on Amazon or any store.
- Please note, that the nutrition value can vary depending on what product you use. The information below is an estimate. Always use calorie counter you are familiar with.
Brooklyn J says
No-knead bread is surprisingly easy and produces such a delicious crust. Perfect for bread lovers
Deb says
Before I attempt this recipe, I have a glass pyrex casserole with a lid. Can I use this to make the bread? I don't have the other types of baking equipment.
Or I have a heavy stainless "stew" pot with a lid.
Thanks for your help.
Anna says
Hi Deb! I have not used glass or stainless steel pots to bake this bread. You will have to test it. Make sure they can be used in the temperature mentioned in the recipe.
Rose says
Most parchment paper suggests use 420 degrees. Can we bake bread at that temp or your instruction at 450 degrees. Is it safe?
Rose says
If u don’t hav a Dutch oven, what kind of pan can u use
Dana says
Super easy and super good! I started baking after six hours of rising, and it turned out great. I did double the yeast so the bread would rise faster and I did not heat the cast-iron first and it still turned out crunchy on the outside and beautiful soft on the inside. I what is it that I have to do right now grease the inside of the cast-iron and used a little cornmeal on the bottom, so it came out easy.
I’ll be making this quite often. Thanks for the recipe. 🤗
Jerry says
Is it possible to make this gluten-free or sourdough?
Joanne says
I used this recipe and my dough sat out for about 14 hours, super sticky. After getting the dough out of the bowl onto the parchment paper, even after adding lots of flour on the top and bottom, I couldn’t scrape the dough off the paper to make a ball. I should’ve started with 31/4 to 31/2 cups of flour to start with. I ended up throwing the dough away in the garbage and starting over. I also should’ve tried to form the dough on my counter top before placing it on parchment paper.
Karen says
Question about the sugar quantity in this recipe - is 1/4 teaspoon correct?
Anna says
Hi Karen! Yes, it is.
Jola says
The perfect recipe for me. Everyone praises the wonderful bread and the smell that floats around the house, and the preparation was simple and quick. Very readable recipe.
Lois Greene says
This was so easy and really, really great! Toasted then buttered. Fabulous!
Lois Greene says
For the lady who commented on the site kept saying it was cornbread. It is not cornbread. It is delicious though.