Make the Best Pizza Dough with our photo tutorial packed with tips on making the best pizza at home. A fail-proof and easy recipe that makes the best crust!
You can make 2 regular pizzas or 3 thin-crust pizzas with this recipe. Top it with Homemade Pizza Sauce, pepperoni, cheese and any toppings you like.
Ingredients:
- 1.5 cup water (warm, from your hot water faucet)
- 1.5 teaspoon sugar
- 1.5 teaspoon active-dry yeast
Instructions:
- Combine water and sugar in a large bowl. Stir gently to help the sugar to dissolve.
- Sprinkle yeast and stir in.
- Let it sit for about 10 minutes until you see bubbles forming on the surface.
- Gather the rest of the ingredients: 3 cups of flour, a pinch of salt and 1 tablespoon oil.
- Add flour to your yeast mixture. Begin with 3 cups of flour. It might be enough but you will know as you work with the dough if you need a bit more. Not enough flour and it will stick to the counter, your hands, rolling pin etc.
- Sprinkle the salt over your dough and add the oil. Stir until the dough forms and separates from the sides of the bowl.
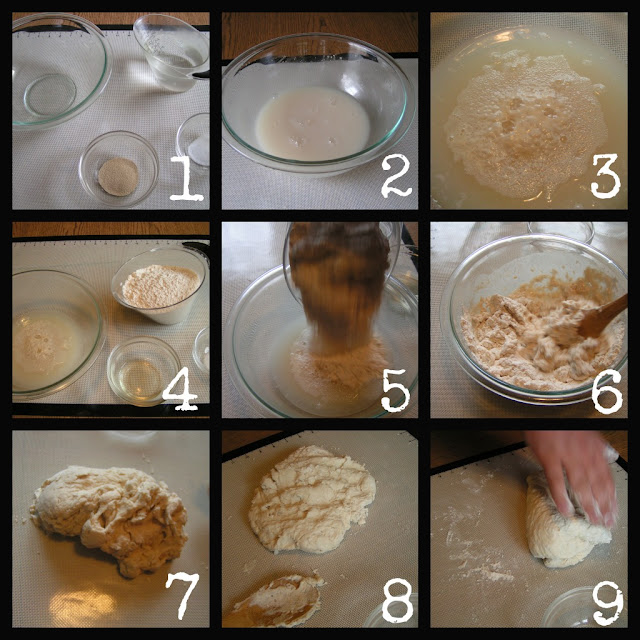
8. Flatten the dough with your hands,
9. Now the fun begins! You get to fold and punch the dough!

How to knead pizza dough?
10. Fold from right.... 11..... to left... 12. ... punch down... 13.... really doesn't matter just eventually form into a ball.
14. Like this.
15. Clean the bowl you mixed the dough in and coat lightly with cooking oil. Place your ball of dough inside. Turn it a few times to coat the dough with the oil.
16. Cover the bowl with a cloth or a towel.
17. Let rise until it doubles in size. A tip my wife taught me is on a cold/cool day to heat up a cup of water in the microwave and then placing my dough inside. Not a problem right now with the heatwave we are going through in the Midwest ;). In theory, you want your dough to rise as slow as possible at cool temps such as a refrigerator overnight but in reality, I am unable to plan that far ahead and need to spend as little time on prepping dinner as possible.
Would you like to save this recipe?
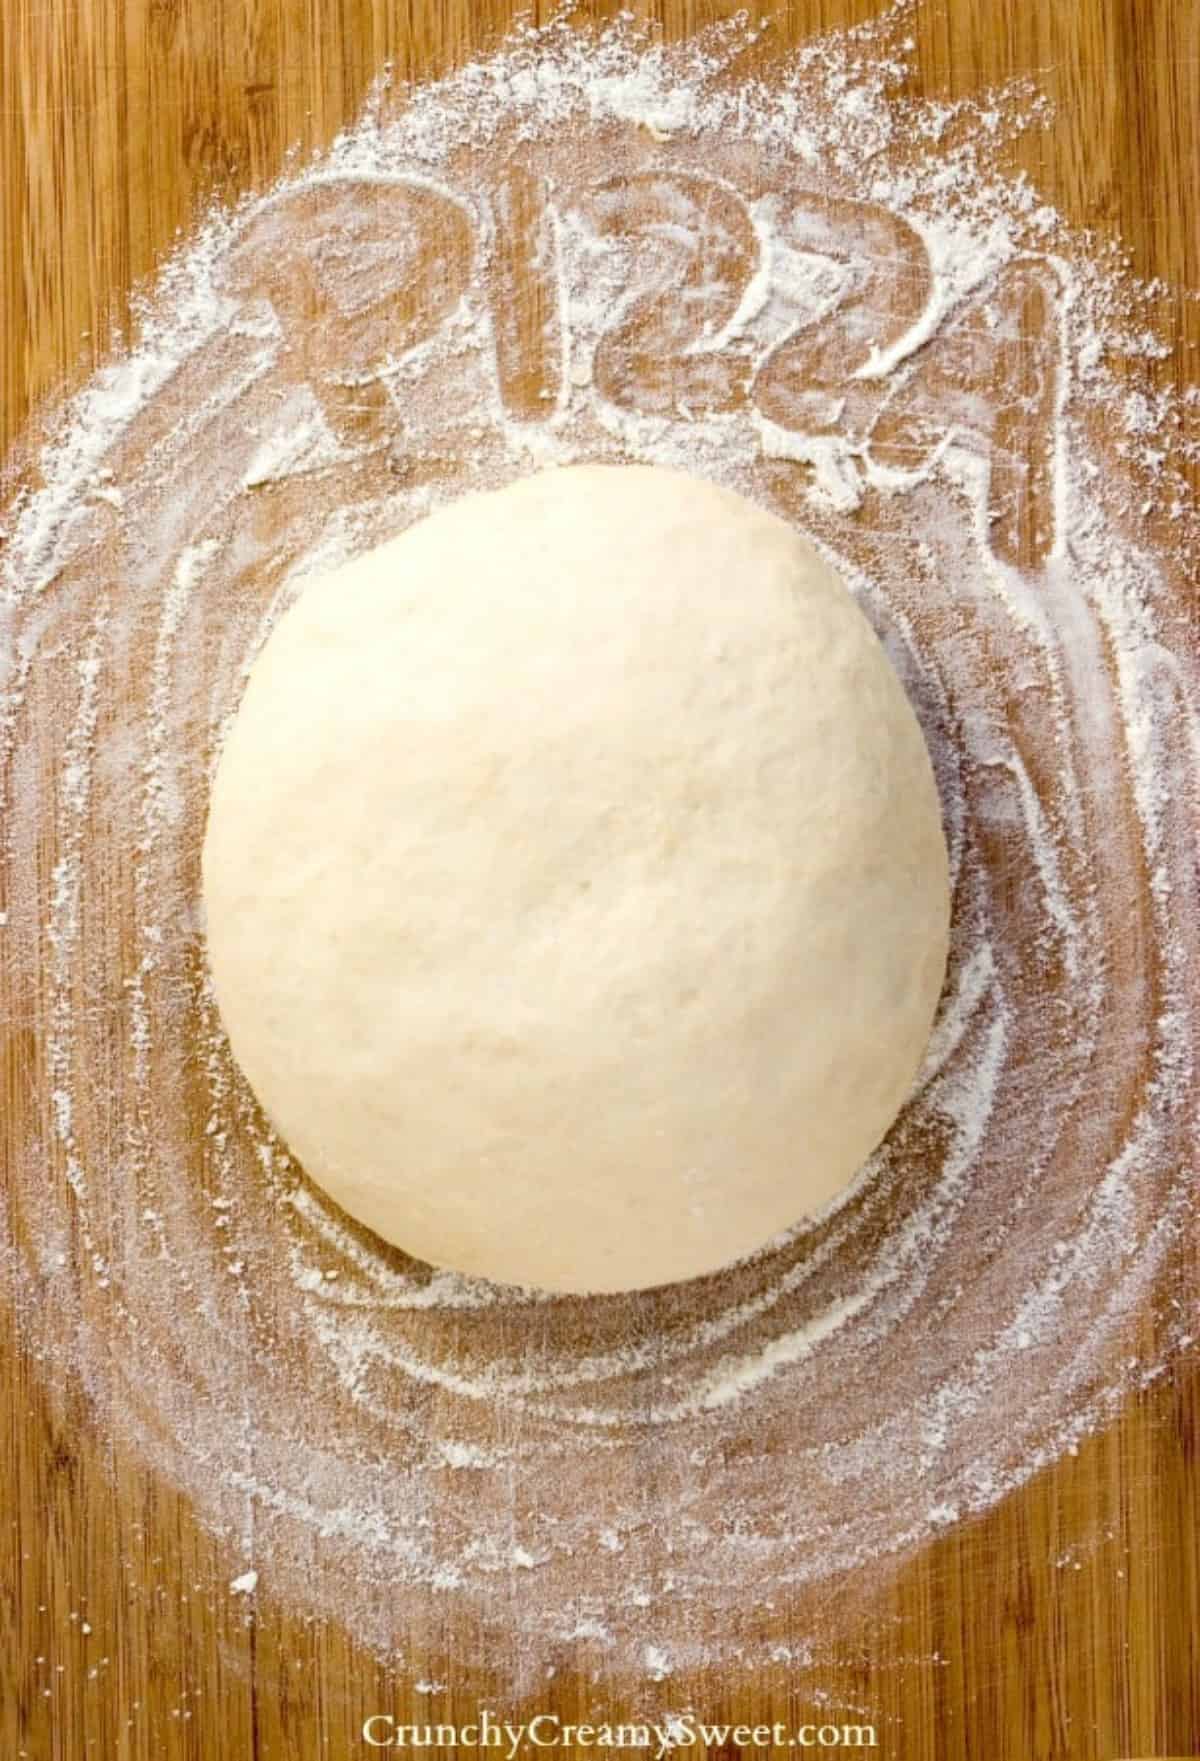
18. This is how your dough should look like after rising.

Forming pizza dough:
19. Turn your dough back onto the floured surface or a mat. Flatten down.
20. Form it into a log...
21. ...like this.
22. Divide into three equal parts. You can always divide the ingredients but we usually have three pizzas with leftovers for tomorrow's lunch.
23. Form each part into a ball and let sit a few minutes. In the meantime, preheat the oven to 425 degrees F.
24. One by one, flatten each ball into a disk.
25. After hand flattening to a circle use your rolling pin to get it as thin as you are comfortable handling and it staying together. Your dough will be pretty flexible and if it does rip or develop a hole, you can fix it as it is very forgiving. Simply fold over where it ripped or take a little piece from a thicker part of the dough and smash it in. Worst case scenario: roll it all back up and roll it back out again. I try to roll it out as circular as I can and as close to the size I want so I don't need to stretch it out a whole lot to get to my edges. You don't need these pizza pans. Freeform pizza works even better and is much easier, but my kids are familiar with commercial pizza and believe that the perfectly round pizza tastes infinitely better.
26. Have your pizza pan SLIGHTLY greased with cooking oil or sprayed with it. Place the pizza dough on top, then turn over so the dough is coated.
27. Now here is the trick: use both hands to create the edges. With one hand pushing /squishing the dough towards the edge of your pan and over and the other hand flattens it so it will stay in place.
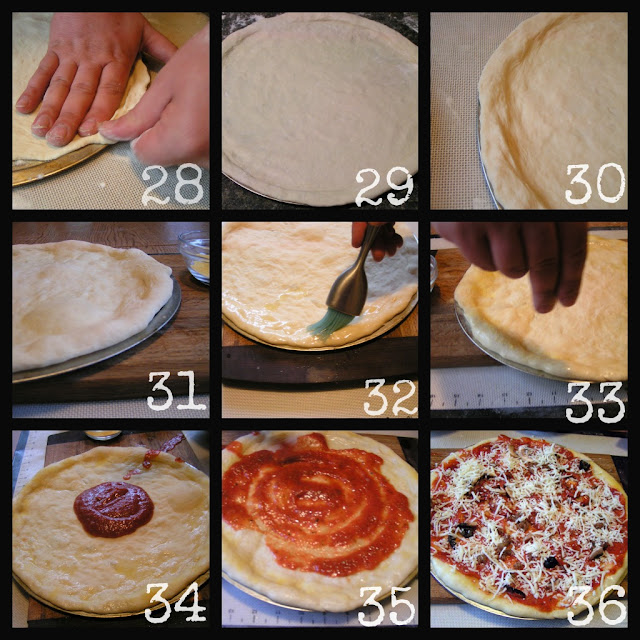
28. Push and flatten.
29. You a-like-a-the pizza crust, no? 🙂
30. After you form your crust it needs to proof a bit; you can do this by letting it set for a while or pop it in the oven for about 5 minutes, pull it out and then add your toppings.
31. Your crust is ready to be finished and topped.
32. Brush the edges with melted butter...
33. ... and sprinkle with cornmeal.
34. Spread the sauce in a circular motion.
35. ...until it's nice and coated.
36. Top with your favorite toppings and bake 15 - 18 minutes. Enjoy!
Expert tips:
- warm water: use warm tap water
- sugar: highly recommended for the best results
- yeast: make sure your yeast is not expired or the pizza dough won't rise properly
- flour: use bleached all-purpose flour for the best results
- oil: highly recommended for the best texture
- salt: highly recommended for the flavor
More pizza recipes:
- Homemade Pizza Sauce
- Best Homemade Pepperoni Pizza
- New York Style Pizza
- Stuffed Crust Pizza
- Easy Pizza Bread

If you like this recipe and make it, snap a photo and share it on INSTAGRAM! Tag me @crunchycreamysweet so I can check it out and leave a comment! 😀
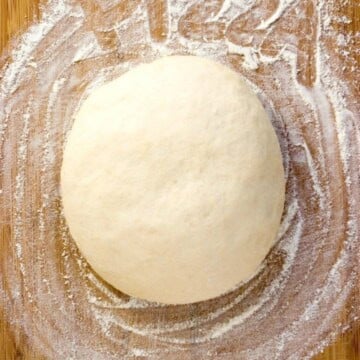
Homemade Pizza Dough
Ingredients
- 1 ½ cup warm tap water
- 1 ½ teaspoon granulated sugar
- 1 ½ teaspoon active dry yeast I used Red Star Yeast
- 1 Tablespoon olive oil
- ½ teaspoon salt
- 4 cups all-purpose flour
- oil for greasing pans
- cornmeal for dusting pans
Instructions
- Place water and sugar in a large mixing bowl. Stir until sugar dissolves.
- Sprinkle yeast over the water and stir few times. Let sit until foamy (about 5 minutes).
- Add 2 cups of flour and salt. Mix in with a wooden spoon until combined.
- Add oil and mix well.
- Add third cup of flour and stir it in with a wooden spoon.
- Place dough onto a floured surface and knead it the last cup of flour.
- Knead the dough until smooth and no longer sticky. It should be smooth.
- Place the dough into a oiled large bowl, cover with a kitchen towel.
- Place in a warm and draft-free place until doubles in size, about 1 hour.
- In the meantime, prep the pizza pans by lightly greasing them and sprinkling with cornmeal.
- Punch the dough down. Transfer back onto the floured surface. Smooth out into a ball.
- Divide into two equal pieces.
- Roll out one piece into a circle, about the same size as your pizza pan. Place on the pizza pan, stretching the sides.
- Preheat the oven to 420° F.
- Place the pizza dough in the oven and bake for 7 minutes.
- Brush the sides of the pizza with melted butter and sprinkle with 1 tablespoon of cornmeal.
- Top with toppings and bake 12 to 15 minutes.
Notes
- This recipe makes 2 large pizzas or 3 thin-crust pizzas.
- Please note, that the nutrition value can vary depending on what product you use. The information below is an estimate. Always use calorie counter you are familiar with.



CrunchyCreamySw says
Hi Tanya! We used 12" pizza pans. This recipe makes three thin crust pizzas or two thick crust pizzas. I think you should have no problems making 2 16" pizzas. Let me know how it goes! Thank you!
Amanda Cortez says
Just came across this recipe on Pinterest. I LOVE pizza. I have tried 3 other pizza dough recipes and so far this one IS THE BEST. (Also the first one I've used with yeast) Fantastic! Thank you for sharing!!
CrunchyCreamySw says
Hi Amanda! Thank you so much for letting us know! We make this recipe almost every week! We did last Friday! It's fantastic to know that others love it too! Thank you!!
Sahar Durali says
Hii --quick question. You mentioned that in step 22-24 you roll the dough into three balls/disks. Do you then have three different pizzas, or did you roll all the disks together with the rolling pin after you separated them? What's the point of separating the dough? Just wondering-I've never made pizza dough and I'd like to try it.
CrunchyCreamySw says
Hi Sahar! Yes, we made 3 pizzas. That's for a thin crust. My newer post has the whole recipe and lots of tips. Check it out here: https://www.crunchycreamysweet.com/homemade-pepperoni-pizza/
caramel eyes says
They made the pizzas. He said you can do three pizzas or freeze the other two disks and that they keep for a while. Hope that helps.
John says
This is an awesome find! Thank you!!
CrunchyCreamySw says
Thanks, John!
Melissa Randall says
I don't see an oven temp. Am I missing it? Thank you.
CrunchyCreamySw says
It's 425 degrees F. Thanks, Melissa!
Grubarazzi says
I'm keeping this post close for my next pizza night!
Ali says
I just made homemade pizza dough for the first time yesterday! So fun. And now I wish I'd had your tutorial -- this is great!! 🙂
Anne@FromMySweetHeart says
What a FABULOUS tutorial! I am definitely bookmarking this because I must admit, though I don't do delivery anymore, I've been buying my dough from Trader Joe's! Thanks Mr. CCS! : )
All That I'm Eating says
Great tutorial. I love making pizza but I can never seem to get the base round!
The Better Baker says
Awesome tutorial! Great job to both of you...I'm sure this is yummylicious! Nothing beats homemade.
Curry and Comfort says
I have never made my own pizza dough.... you know I have a fear of dough. I loved your step by step tutorial! Tell you hubby way to go!! 🙂 The dough looks perfect and the pizza.... do you deliver? 🙂
Lizzy says
Thank you, Mr. CCS! Your dough looks PERFECT! It's time to dig out the pizza stone and treat the family 🙂
Astral de la Mare says
Such a brilliant post! I love making pizza dough but I don't make it nearly as often as I should.
Crunchy Creamy Sweet says
We hope you will give it a try! Thanks!
Ellen B Cookery says
There's nothing like a good pizza. We also made pizza for dinner tonight.
Torviewtoronto says
lovely post deliciously done pizza
atthepatisserie says
OOOh, great job, Mr. CCS! I'd love to see pics of that pizza crust after baking 🙂
Crunchy Creamy Sweet says
Thank you, Ann! There will be a follow up post with a pizza recipe. Stay tuned 🙂