• Skip to main content
  • Skip to primary sidebar

Crunchy Creamy Sweet

Easy Recipes for Busy Parents

  • All Recipes
  • Air Fryer
  • Asian
  • Dinner
  • Instant Pot
  • Dessert
  • About Us
menu icon
go to homepage
  • All Recipes
  • Subscribe
  • About Me
  • Contact
    • Facebook
    • Instagram
    • Pinterest
    • YouTube
  • subscribe
    search icon
    Homepage link
    • All Recipes
    • Subscribe
    • About Me
    • Contact
    • Facebook
    • Instagram
    • Pinterest
    • YouTube
  • ×

    You are here: Crunchy Creamy Sweet / Instant Pot / Instant Pot Cheesecake Recipe

    Instant Pot Cheesecake Recipe

    Published: Oct 5, 2019 · Modified: Mar 22, 2020 by Anna 132 Comments · This post may contain affiliate links.

    Sharing is caring!

    24986 shares
    • Share
    • Tweet
    Jump to Recipe Print Recipe

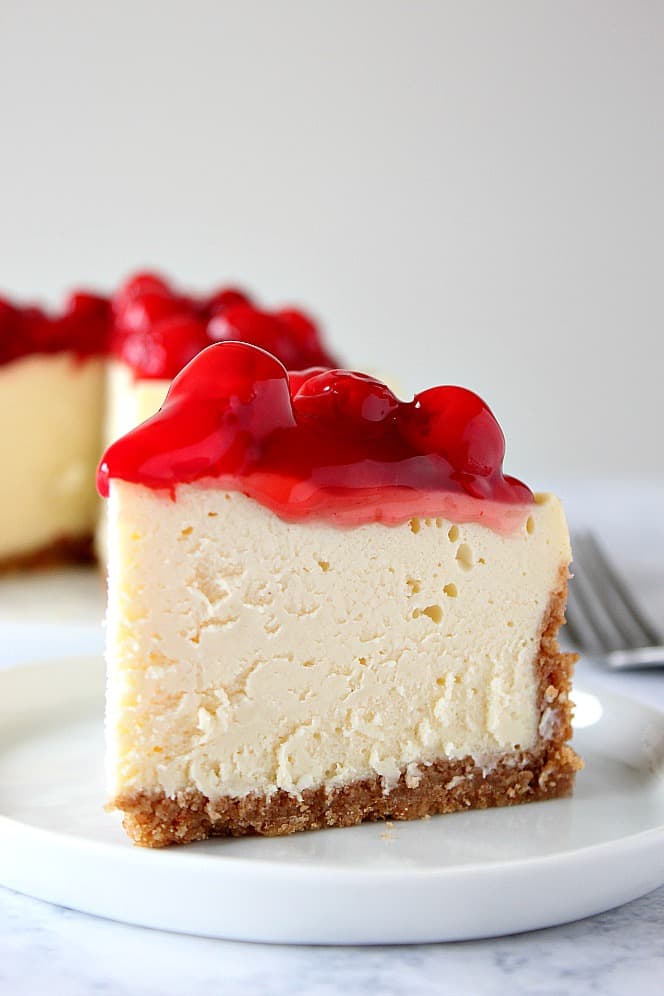
    Instant Pot Cheesecake is the best creamy and irresistible vanilla cheesecake with cherry pie topping. Perfectly cooked in the pressure cooker!

    Instant Pot can be used to make delicious desserts! This cheesecake is my favorite, but the Instant Pot Chocolate Lava Cakes are amazing too. Cheesecake fans will love my Caramel Apple Cheesecake.
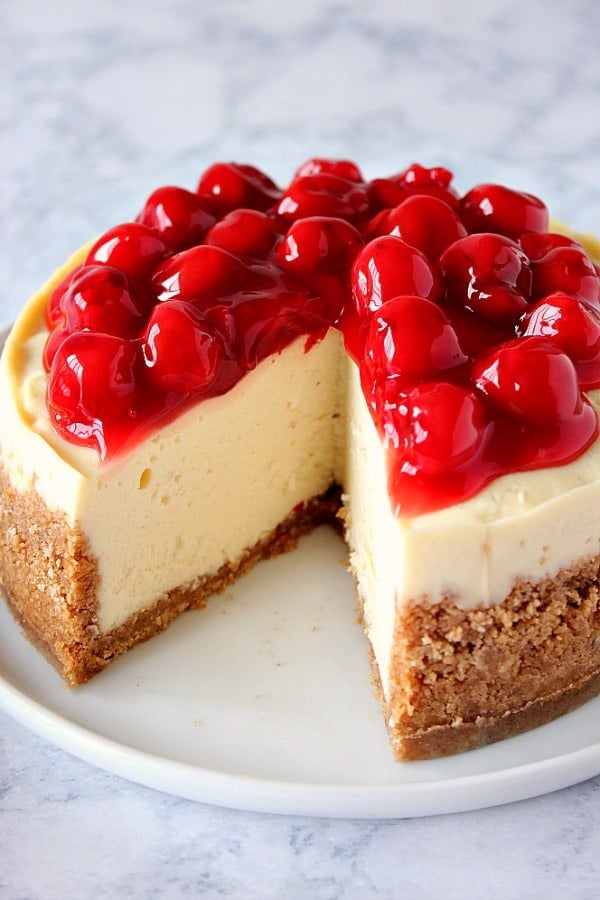
    Cheesecake with cherry topping on white serving plate.

    One of my favorite and most impressive things to make in the Instant Pot pressure cooker is definitely cheesecake. You see, cheesecake is my thing. It's our favorite dessert and over the years, I perfected my go-to recipe. Even my crust is perfect. It doesn't crumble and fall apart. The fact that I can make an absolutely perfect creamy and light cheesecake in my IP, blows my mind every time.

    This Instant Pot Cheesecake is so easy to make, you don't need any special tricks to make it, each slice is tall and creamy and the whole thing is gorgeous topped with cherry pie filling. My fail-proof crust lets you lift the whole cheesecake off the pan!

    Ingredients:

    • graham crackers
    • butter
    • granulated sugar
    • 16 oz. cream cheese
    • eggs
    • flour
    • sour cream
    • vanilla extract
    • pie filling for topping (I used cherry)

    Kitchen tools needed:

    • Instant Pot (I used my 6 qt Ultra)
    • trivet (it comes with your Instant Pot)
    • 7" springform pan
    • hand mixer
    • mixing bowls
    • spatula

    Instructions:

    • Start with the crust. Combine all ingredients in a mixing bowl, then press it down and up the sides of your springform pan. Place the pan with crust in the freezer while you make the filling.
    • To make the filling: combine all ingredients to make a smooth batter. Pour over prepared crust and smooth out the top.
    • Place trivet in your IP, add 1.5 cups of water and place the pan with cheesecake on a trivet.
    • Close the IP, set the valve to "sealing" position and press the "manual" setting. Set timer to 30 minutes.
    • Once the timer is done, let the IP release the pressure naturally.
    • Carefully open the lid and let the remaining steam escape. Use a paper towel to gently blot the surface of the cheesecake from any additional condensation.
    • Cool the cheesecake completely, then chill in the fridge for at least 4 hours, preferably overnight.
    • Top with filling before serving.
    Slice of pressure cooker vanilla cheesecake on a small plate.

    Storing:

    Any leftovers should be refrigerated for up to 3 days.

    What size springform pan fits in the Instant Pot?

    The pan size depends on the size of your Instant Pot.

    • If you have a 6qt Instant Pot, you will need a 7" round springform pan.
    • If you have 8qt Instant Pot, the standard 8" springform pan should fit.

    Best tips:

    • the crust - My crust recipe is fail-proof and is important for a beautiful cheesecake as a base for each slice. You can prebake it or freeze it for 10 minutes, while you are making the batter.
    • add flour and sour cream - Both ingredients are important for the best texture of the cheesecake. It will be creamy, light and won't underbake.
    • removing condensation from the surface - Baking cheesecake in the IP involves steam so you will have condensation build up on the surface of the cheesecake. You can cover it with aluminum foil before cooking, but I like to avoid using foil. All you need is a paper towel and gently blot the surface of cooked cheesecake to absorb the moisture.
    • cooling before chilling - It is very important to cool the cheesecake completely after baking. Then place it in the fridge to chill. The cheesecake will be best if you let it chill overnight. Plan ahead!

    Flavors and toppings ideas:

    • pie fillings: You can use any pie filling you like to customize this recipe. I used cherry pie filling.
    • fresh fruit
    • caramel sauce
    • sour cream mixed with granulated sugar and vanilla extract
    • sauteed apples with caramel sauce
    • chocolate ganache
    • add 2 oz. of chocolate (melted) to the batter for a chocolate cheesecake
    • swirl caramel sauce in the batter before pressure cooking
    • add lemon zest for lemon cheesecake, and top it with fresh blueberries or blueberrie pie filling
    • use any cookies you like to make the crust (Oreos, gingersnaps, etc.)
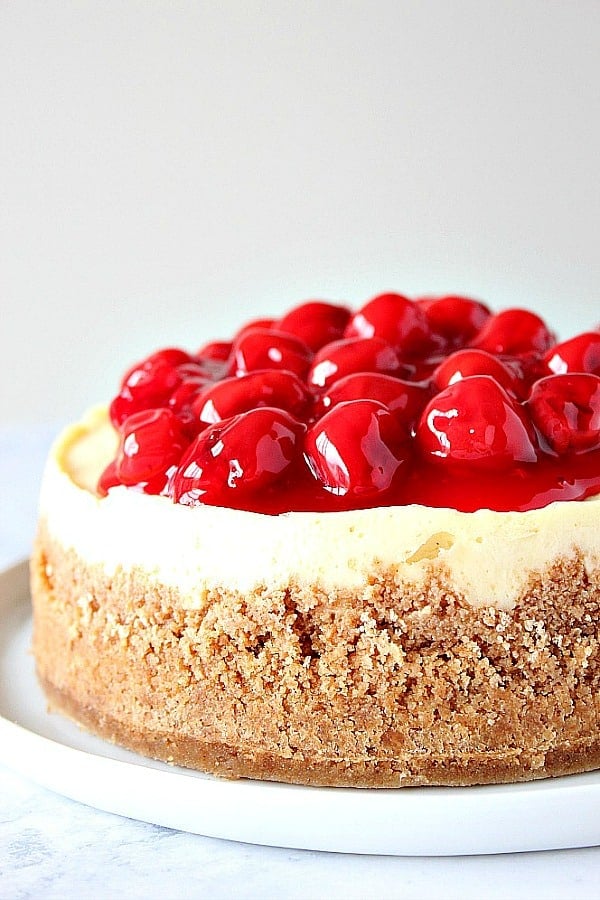
    Instant Pot Cheesecake on a white plate.

    More cheesecake recipes:

    • Funfetti Cheesecake Bars
    • Lemon Raspberry Cheesecake Bars
    • Perfect Cheesecake
    • Caramel Apple Cheesecake
    • Orange Cranberry Cheesecake

    Check out my Instant Pot Guide for Beginners, filled with all the info you need to get started with your new appliance!

    If you like this recipe and make it, snap a photo and share it on INSTAGRAM! Tag me @crunchycreamysweet so I can check it out and leave a comment! 😀
    Instant Pot Cheesecake

    Author: Anna
    The best creamy and irresistible vanilla cheesecake with cherry pie topping. Perfectly cooked in the pressure cooker!
    4.94 from 45 votes
    Print Recipe Pin Recipe
    Prep Time 20 mins
    Cook Time 30 mins
    pressure release 15 mins
    Total Time 50 mins
    Course Dessert
    Cuisine American
    Servings 8 people
    Calories 511 kcal

    Ingredients


    for the crust:

    • 1 cup graham cracker crumbs
    • 2 teaspoons granulated sugar
    • 4 tablespoons unsalted butter melted

    for the cheesecake:

    • 16 oz. cream cheese softened (see note)
    • ½ cup granulated sugar
    • 2 large eggs room temperature
    • 4 tablespoons all-purpose flour
    • 4 tablespoons sour cream
    • 2 teaspoon pure vanilla extract
    • 1.5 cup cherry pie filling

    Instructions
     

    • Make sure the stainless steel insert is in your IP. Set trivet inside, add 1.5 cups of water to the bottom of the insert.
    • To make the crust, combine graham cracker crumbs, sugar and melted butter in a mixing bowl. Stir with a fork. Sprinkle on the bottom of the 7" springform pan. Use a flat-bottom glass to press the crust onto the bottom and up the sides. Not all the way, but about ¾ up the sides of the pan. Place pan with crust in the freezer while you make the batter.
    • In a large mixing bowl, beat cream cheese with a hand mixer for 30 seconds. Add sugar and mix well.
    • Add eggs and mix just until combined. Do not overmix.
    • Add flour and sour cream to batter and mix just until combined. Add vanilla and stir in with a spatula.
    • Pour the cheesecake batter over the prepared crust. Place pan carefully on the trivet in your Instant Pot. Close the lid and set the valve to "sealing" position. If you have a newer version of the Instant Pot, you don't have to do that since the lid does it as you close it.
    • Make sure your IP is set to cook on high pressure. Press "manual" setting and set timer to 30 minutes. The IP will beep after a few seconds and it will start cooking.
    • Once the timer is up, do not release pressure but let it release naturally. When the valve dropped, carefully open the lid away from your face and let any remaining steam escape. Using a paper towel, gently blot the surface of your cheesecake from any built up condensation. Let cheesecake cool for 5 minutes, then remove carefully from the IP.
    • Let the cheesecake cool completely, then place in fridge to chill for at least 4 hours, to overnight.
    • Top cheesecake with pie filling before serving. To cut perfect slices, clean the knife after each cut.

    Notes

    1. To make the cheesecake, you need 16 oz. of cream cheese. That is 2 8oz. packages. Make sure they are softened very well.
    2. Use a long sharp knife (like chef's knife or utility knife) to loosen up the crust from pan, then gently slide it onto a serving plate or a cake stand.
    3. The leakproof pans do not have a rim around and it helps to lift the cheesecake. See my post for a product recommendation.
    4. The cheesecake is not too sweet and it pairs perfectly with a rich topping. Keep that in mind.
    5. Since some readers said it does not have enough flavor by itself (without topping), I increased the amount of vanilla in the recipe from 1 teaspoon to 2 teaspoons. 
    6. Please note, that the nutrition value can vary depending on what product you use. The information below is an estimate. Always use calorie counter you are familiar with.

    Nutrition

    Calories: 511kcal | Carbohydrates: 58g | Protein: 6g | Fat: 28g | Saturated Fat: 15g | Cholesterol: 121mg | Sodium: 292mg | Potassium: 237mg | Fiber: 1g | Sugar: 17g | Vitamin A: 1260IU | Vitamin C: 4mg | Calcium: 91mg | Iron: 1.3mg
    Tried this recipe?Leave a comment with rating below!

    This recipe was originally published on October 17th, 2018 and updated on October 5th, 2019.

    More Instant Pot Recipes

    • Applesauce next to Instant Pot.
      Instant Pot Applesauce
    • Instant Pot teriyaki chicken on a plate.
      Best Instant Pot Teriyaki Chicken
    • Sliced corned beef on a plate.
      Instant Pot Corned Beef
    • Turkey stock in a glass jar next to Instant Pot.
      Instant Pot Turkey Stock

    Reader Interactions

    Comments

      Did you make this recipe? Let me know! Cancel reply

      Your email address will not be published. Required fields are marked *

      Recipe Rating


    1. Terri says

      April 01, 2023 at 11:34 am

      Can the cheesecake be wrapped well and frozen before adding any toppings? I want to make it this weekend, for Easter next weekend.

      Reply
      • Anna says

        April 01, 2023 at 12:56 pm

        Hi Terri! Yes, you can freeze the cheesecake. Wrap it well so it does not dry out. I hope this helps!

        Reply
    2. Dale says

      March 21, 2023 at 12:27 am

      Hello, I'm a single 65 yr old man looking forward to making this in a few weeks. I have a question about the stainless steel inner pot, mine is non stick. Will it be alright to use this instead? I'm relatively new at instant pot, but not a newbie, I've had your recipe bookmark for a while, and decided to give it a try, thank you for all the detailed instructions. I'll let you know how it turns out.
      Dale

      Reply
    3. Toni says

      March 14, 2023 at 1:14 pm

      5 stars
      Easy and delicious 😊

      Reply
    4. Monika says

      February 17, 2023 at 4:01 pm

      5 stars
      Best cheesecake ever! Super easy and incredible taste. Do you know if I could try it in the oven and how? Would be a lot of help! Thank you for sharing!

      Reply
      • Anna says

        February 25, 2023 at 11:07 pm

        Hi Monika! I am so glad the cheesecake was a success! If you want to make it in the oven, I highly recommend following this recipe: https://www.crunchycreamysweet.com/how-to-make-a-perfect-cheesecake/ I hope this helps!

        Reply
    5. Linda Vasconcelos’s says

      March 13, 2022 at 10:38 am

      5 stars
      I tried this recipe this morning, I used Splenda instead of regular sugar and found it sweet enough, my son doesn’t like a topping on his cheese cake so I’ll just sprinkle some Graham Cracker crumbs on top. It was quick and easy and I will make it again. We both love Cheese Cake so it will NOT last the four hour chilling period . FYI I always use a Spring form pan that has the clip on the side for easy release.

      Reply
    6. Marthalyn says

      February 24, 2022 at 2:40 pm

      I haven't tried it yet. I make cheesecake for my niece who has celiac disease and can't use flour. Can I substitute corn starch

      Reply
      • Anna says

        February 24, 2022 at 3:05 pm

        Yes, you can. I hope your niece loves the cheesecake!

        Reply
    7. Rhoda Toshimitsu says

      January 10, 2021 at 3:42 pm

      Making this recipe for Cheesecake in my IP for the first time today . Super easy instructions and ingredients ... It's cooking right now ! 28 minutes to go + venting . Will chill overnight . Looking forward to cheesecake with my coffee in the morning ! Could you post in the comments what your IG handle is so I may tag you in the final outcome ?

      Reply
      • Anna says

        January 10, 2021 at 4:10 pm

        Sounds wonderful! I hope you love it, Rhoda! My IG is @crunchycreamysweet

        Reply
      • Susan palle says

        March 24, 2022 at 5:29 am

        5 stars
        I made this yesterday. Used almond flour, splenda, and omitted the crust, making it lower carb. It holds together without the crust. Thank you for this delicious recipe. No topping needed, but could use low sugar jam.

        Reply
    8. Rick Kutcher says

      December 27, 2020 at 8:31 pm

      5 stars
      I've made easily about 15 cheesecakes using this recipe. They ALWAYS turn out perfectly. I've also adjusted it to make an Oreo cheesecake that my son loves. Do you have a recipe for Turtle cheesecake by any chance? I've had a request to make one for friends.

      Reply
      • Anna says

        January 01, 2021 at 5:22 pm

        That is absolutely wonderful! Thank you so much, Rick!
        If I was to make the Turtle version, I would add chopped pecans to the crust and after baking, drizzled it with ganache and caramel sauce, then top with chopped pecans. I hope this helps!

        Reply
    9. Mandy says

      November 24, 2020 at 3:13 pm

      5 stars
      Love this recipe super easy!! Family favorite....I've just winged it making a chocolate version of this is there an actual way to make a chocolate one that you'd recommend?

      Reply
    10. Laura says

      October 13, 2020 at 1:25 pm

      4 stars
      Very good cheesecake and super easy. Nice flavor and smooth. I thought it was a little bit too "firm" though. I wanted it a bit softer on the fork - do you think removing some flour would with this issue? It's my first time making cheesecake, so I'm not sure what the right solution is.

      Reply
    11. Nikki says

      September 27, 2020 at 11:55 am

      I made this for the first time last night and it’s a little under-done in the middle. Followed recipe exactly. Can’t see that others had this problem.

      Reply
    12. Brenda says

      August 16, 2020 at 8:19 pm

      My cheesecake turned out beautifully, but the taste was rather bland . I used all high quality ingredients. Maybe lemon zest would improve the flavor.

      Reply
      • Anna says

        August 17, 2020 at 11:29 am

        Hi Brenda! What did you top the cheesecake with? I used cherry topping so it was a great balance of flavors. If you are not using a topping, increase the vanilla extract to 2 teaspoons.

        Reply
      • Jeff says

        November 28, 2020 at 8:52 pm

        5 stars
        Thank you! This is the 28th of November. I have made this recipe 5 times this month and it is perfect every time! Plain, cherry topped, blueberry topped and tonight strawberry. I love it.
        Thank you again!

        Reply
        • Anna says

          November 29, 2020 at 5:46 pm

          Thant is absolutely fantastic, Jeff! Thank you so much!

          Reply
    13. Sarah says

      August 07, 2020 at 11:07 am

      I'm making this right now and realizing that the directions don't tell us to cover the cheesecake before placing it in IP to cook. Is that correct?

      Reply
      • Anna says

        August 07, 2020 at 12:56 pm

        Hi Sarah! I do not cover my cheesecake. You can if you want to.

        Reply
        • Drea says

          January 04, 2021 at 9:08 pm

          If you cover it in tin foil like I just did, it will come out way underdone. I decided to uncover it and pressure cook for 5 more minutes, we’ll see what happens!

          Reply
    14. Audrey says

      June 13, 2020 at 2:47 am

      How tall does the 7 inch pan need to be?

      Reply
    15. Nikki says

      June 04, 2020 at 9:59 pm

      Not sure if you have the answer but If I want to double the recipe for a fuller cheesecake in my 8 inch springform, do I still cook for 30 minutes? Thank you!

      Reply
      • Anna says

        June 05, 2020 at 11:39 pm

        The cooking time stays the same. Hope this helps!

        Reply
      • Tiffy says

        June 14, 2020 at 6:45 am

        Hello. I have one question:

        I use the IP mini 3 quart. I love it.
        For your cheesecake, do you turn off the KEEP WARM button?

        Thank!

        Reply
        • Kim says

          September 12, 2020 at 12:50 pm

          Did you ever get a response? I have the same question

          Reply
        • Anna says

          September 12, 2020 at 1:00 pm

          Yes, I do. You can even unplug the IP.

          Reply
      • Jean Camerer says

        June 15, 2020 at 11:26 pm

        5 stars
        I made this cheesecake today. I stirred 1/4 cup of miniature chocolate chips into the cheesecake mixture before pouring into the springform pan. Turned out perfectly and not too sweet!

        Reply
        • Anna says

          June 18, 2020 at 2:10 pm

          Thank you so much, Jean!

          Reply
      • Wendy says

        May 07, 2022 at 1:25 pm

        5 stars
        I made this for our son's 30th birthday as a Turtle cheesecake.
        My son loved it! I used monkfruit instead of sugar. I also made Keto carmel sauce and Keto ganache.
        Thank you for such an easy recipe!

        Reply
    16. Julie Pontoni says

      May 25, 2020 at 8:24 pm

      Is your calorie total for the entire thing?

      Reply
      • Anna says

        May 25, 2020 at 10:48 pm

        Hi Julie! The calorie amount is an estimate per serving.

        Reply
    17. Stephanie C. says

      May 13, 2020 at 2:08 pm

      5 stars
      This recipe was the first cheesecake recipe I aver attempted. It was easy to make and for the most part it was perfect. The center was a little runny. Do you think moisture got in? The crust and outer edges were perfect.

      Reply
    18. Linn says

      April 30, 2020 at 1:04 pm

      5 stars
      Everything was great except I have an 8 qt. Pot and 8” pan so it was thin. Could I do adding a 1/2 of all ingredients? Would cooking time change?

      Reply
    19. Lindsey says

      April 23, 2020 at 3:41 pm

      How long does it usually naturally release for?

      Reply
      • Mindy says

        April 25, 2020 at 5:31 pm

        I let my IP naturally release for 30 minutes. Turned out great!

        Reply
        • Anna says

          April 27, 2020 at 3:19 pm

          Awesome! Thank you, Mindy!

          Reply
    20. Steph says

      April 21, 2020 at 6:02 pm

      Can I use a regular spring form pan or doing need to buy one specifically for the ip?

      Reply
      • Jamie says

        April 25, 2020 at 7:06 am

        Just a regular spring form!
        It’s perfectly safe in the IP.
        🙂

        Reply
        • Maureen says

          April 24, 2022 at 7:46 am

          5 stars
          For a 6qt Duo does 7" pan work. If not how would you adjust the recipe ?

          Reply
    21. Staci says

      April 19, 2020 at 5:46 pm

      5 stars
      Made this yesterday and had a slice today... this is on par with a true New York cheesecake. It was perfect! Dropped some slices off to our neighbors and they raved about how good it was. Thanks for a great recipe!

      Reply
      • Anna says

        April 20, 2020 at 8:18 pm

        Hi Staci! Thank you so much for trying my recipe. I absolutely love that you shared it with your neighbors!! So sweet of you! I am so happy that the cheesecake was a hit. Have a beautiful day!

        Reply
    22. Debbie says

      April 18, 2020 at 2:55 pm

      I’m trying this recipe for the first time..this will be my second IP cheesecake and my first turned out wonderful (except I didn’t know to let it set before digging in..opps) I also found a tip to add parchment paper to the bottom to keep from sticking. I couldn’t find that recipe again so I’m trying yours...crossing fingers

      After reading these reviews I’m REALLY hoping I didn’t overmix...

      Reply
      • Anna says

        April 18, 2020 at 5:49 pm

        Hi Debbie! The IP cheesecake is incredible. It's always hard to wait for it to cool! 😀 Let me know how it goes!

        Reply
        • Debbie says

          April 19, 2020 at 9:53 am

          I think I over mixed. The middle was a nice silky smooth texture but the outside was dense and tough. I could have left it too long after natural release also...either way...flavors were on point and I will give it another try.

          Reply
    23. Jeff says

      April 12, 2020 at 4:24 pm

      5 stars
      Followed the recipe exactly in a 7-inch springform pan and it turned out wonderful! I added a small disc of parchment paper on the bottom of the pan. The cheesescake pulled away from the sides a little while chilling so there were no problems removing it from the pan. It was a great Easter Sunday dessert-my mom would have been proud!

      Reply
      • Anna says

        April 16, 2020 at 4:50 pm

        Hi Jeff! Great job! I am so glad the cheesecake was a success! Thank you so much for trying my recipe!

        Reply
    24. Scotty says

      April 05, 2020 at 8:13 pm

      Has anyone gotten the Burn notice (couldn't help myself) while making this? I had to shut her down and add a little more water but I am afraid I have messed up the whole recipe. It is my first try so we will see. Hope it turns out okay.

      Reply
      • Stephanie says

        January 15, 2021 at 10:24 pm

        Yes, that happened to me today. It was in there for about 20 minutes and then said burn before the timer even started. I took it out, let it cool and put it in the fridge. Not sure why that happened. I'm sure it probably isn't done but I will see in the morning.

        Reply
    25. valerie goo says

      March 29, 2020 at 11:17 pm

      5 stars
      It was perfect ... most important do not over mix or cook ..... better than anything available to buy ....DaBomb...

      Reply
    26. Doreen says

      March 23, 2020 at 5:29 pm

      Can I sub Greek yogurt for the sour cream ? I hope so since I have all the ingredients except for the sour cream. Thank you

      Reply
      • Anna says

        March 23, 2020 at 5:30 pm

        Hi Doreen! The Greek yogurt should be just fine. I hope you love the cheesecake!

        Reply
      • Jenni says

        May 21, 2020 at 2:52 pm

        I substituted thick whole milk yogurt and the flavor turned out great!

        Reply
        • Anna says

          May 23, 2020 at 10:49 pm

          Awesome! Thanks, Jenni!

          Reply
        • John says

          July 20, 2020 at 10:16 am

          Thanks for this! I make my own IP yogurt and wanted to use it in place of sour cream.

          Reply
    27. Lisa Fornal says

      January 19, 2020 at 8:01 pm

      5 stars
      This was my first IP cheesecake. It was really good. I used sugar substituted sugar and it was still tasty.
      Since it was my first I followed the recipe steps and was surprised the texture was good. The crust was a bit soft but did not fall apart.

      Reply
      • Anna says

        January 19, 2020 at 11:49 pm

        Hi Lisa! Thank you so much for trying my recipe! I am so glad it was a success!

        Reply
      • Deb G says

        January 30, 2020 at 2:32 pm

        My first time making this cheesecake. The picture makes it look like a nice high cheesecake like ya get in a store. So little 😔oh well. I just hope it tastes good. Picture shows nice thick and a nice high crust. My crust wouldn't spread up sides nowhere near that nice and high. Will let ya know how it turned out tonight. Looks nice

        Reply
      • adria says

        February 17, 2020 at 12:17 pm

        4 stars
        My cheesecake turned out on the better side of ok. I feel it lacked something in flavor and there definitely was not enough crust. I think i would of needed 50% more of the crust ingredients to mimic the outcome of the picture you used.
        The texture of the cheesecake also seemed more like extra thick jello and not like traditional cheesecake. Is this perhaps a result of too much mixing or flour? Or is this just typical of an instant pot method?
        I will definitely try this again but tweak the crust ingredient amounts.
        Thank you.

        Reply
        • Anna says

          February 17, 2020 at 1:40 pm

          Hi Adria! If the cheesecake had a texture of jello that means you overmixed the batter. It is not typical for an Instant Pot cheesecake to have this texture. It should be ultra-creamy. The crust is personal preference but I assure you, what you see in the photo is what I used for the recipe. Also, if it lacked in flavor, maybe invest in better vanilla extract. Hope this helps!

          Reply
          • leah says

            March 13, 2021 at 3:44 pm

            Hey I made this once and it was perfect. I made it today again and part of it boiled over the pan. Did I overmix the eggs?

            Reply
      • Marcy says

        July 31, 2021 at 11:45 am

        5 stars
        My crust turned out very soggy. I noticed another post that covering it while cooking resulted in undercooked cake. Is there a suggestion to keep the steam from saturating the crust. I thought using a silicone cover my help but maybe not? I would have liked more crust as shown too. I’ll increase the amount of crumbs next time. However, the cake itself was excellent! I’ve never made a cheesecake before (I didn’t even know it needed water to bake) and it turned out excellent!

        Reply
    28. Bob says

      January 18, 2020 at 10:19 am

      Just made this and it’s cooling now. I don’t see when to take the side if the spring foam pan off or did I miss it?

      Reply
      • Anna says

        January 18, 2020 at 12:52 pm

        Hi Bob! You need to remove the sides once the cheesecake is chilled. I hope this helps!

        Reply
    29. Kristin says

      January 01, 2020 at 2:19 pm

      5 stars
      Turned out AMAZING!! Did it in a 6 inch spring form pan at 35 minutes and it was perfect! Thank you!

      Reply
      • Anna says

        January 01, 2020 at 3:56 pm

        That's wonderful, Kristin! Thank you for trying the recipe!

        Reply
      • Anna says

        January 05, 2020 at 8:21 pm

        Just got my IP the yesterday and I made this today! Turned out great other than the crust...it was pretty soggy. 😩 Not sure what I did wrong.
        Any tips? 😊

        Reply
        • Marilyn says

          February 01, 2020 at 7:49 pm

          On another recipe it says to put foil on the bottom of the pan, to protect for moisture getting in.

          Reply
    30. Miriam Bell says

      December 31, 2019 at 9:35 pm

      5 stars
      Made this today! Used King Arthur measure for measure gluten free flour and made a minced pecan crust since I had no gluten free graham crackers. It turned out perfectly! Will definitely make again.

      Reply
      • Anna says

        January 01, 2020 at 3:57 pm

        Thank you, Miriam!

        Reply
    31. Ernie says

      December 23, 2019 at 5:33 pm

      5 stars
      Very easy and delicious. I made two, one for work and one for family, both were a hit. Making 5 more for xmas. Thank you for sharing this recipe!

      Reply
      • Anna says

        December 24, 2019 at 12:46 am

        Hi Ernie! That is wonderful! I am so happy that you made the cheesecake! Thank you so much!

        Reply
    32. Becky Hardin says

      October 12, 2019 at 11:05 am

      5 stars
      Now this is my kinda instant pot recipe!!! YUM

      Reply
    33. Taylor says

      October 07, 2019 at 9:06 am

      5 stars
      Such a simple way to make cheesecake!! So delicious!

      Reply
    34. Toni says

      October 07, 2019 at 8:49 am

      5 stars
      My guests were really impressed! They loved it!

      Reply
    35. wilhelmina says

      October 07, 2019 at 7:04 am

      5 stars
      I have to admit I have been skeptical of the instant pot desserts I've seen, but yours was so tempting I had to give it a try. I am so glad I did! This cheesecake was so creamy and incredible!

      Reply
    36. Valerie says

      October 07, 2019 at 6:24 am

      5 stars
      Cheesecake is my favorite dessert ever. I love making it in an electric pressure cooker, it's so simple, the hardest part is waiting for it to set enough to eat.

      Reply
    37. Debbie Brooks says

      September 04, 2019 at 7:46 pm

      5 stars
      This is one of the best cheesecakes I have ever eaten. The texture was dense and creamy, no cracks. I even used the reduced fat cream cheese.

      Reply
      • Anna says

        September 04, 2019 at 11:30 pm

        That's wonderful! I am so glad the cheesecake was a hit! Thank you for making my recipe, Debbie!

        Reply
    38. Linda says

      June 19, 2019 at 9:31 pm

      5 stars
      This recipe could not have turned out any better. Amazing! I put chocolate drizzle and strawberries instead of cherries, and it was a huge hit for Father’s Day. Thank you!

      Reply
      • Anna says

        June 20, 2019 at 11:46 pm

        Hi Linda! That is absolutely wonderful! Thank you so much for trying my recipe and for making it for such a special occasion. Have a beautiful day!

        Reply
    39. Korin says

      February 23, 2019 at 9:52 pm

      5 stars
      So today was my very first cheesecake in my instant pot my mom came we made and afternoon of it!! We used your recipe and it came out amazing!!!! I’m so proud you would not believe thank you and thanks for inspiring me try try to do this ( as it’s way out of my comfort zone ... why I called my mom for backup lol)

      Reply
    40. julie burr says

      January 31, 2019 at 1:38 pm

      Hi, I have an 8 qt Insignia and I don't have a manual or pressure button 🙁
      Sound I just use cake button?
      Thanks for any help

      Reply
      • Anna@CrunchyCreamySweet says

        January 31, 2019 at 4:34 pm

        Hi Julie! I am not familiar with Insignia at all so I can't say what setting to use. Does it have a regular setting, as in one that you could use for any dish? If so, I would go with that. Sorry I am not much help here!

        Reply
    41. LEslie says

      January 30, 2019 at 3:51 pm

      Hi there,

      Can I make this in the 8 qt with a 7 inch without making adjustments?

      Thanks! 🙂

      Reply
      • Anna@CrunchyCreamySweet says

        January 31, 2019 at 4:38 pm

        Hi Leslie! If you are using the same size pan, no adjustments are needed. You may need to add more water to the inner pot. Check what the instructions say about a minimum required liquid. Hope this helps!

        Reply
    42. Ann says

      January 29, 2019 at 2:36 pm

      4 stars
      I made this cheesecake last night in my 8 qt instapot. I used a 9 inch springpan and followed directions and cook time exactly. The cheesecake wasn’t “fluffy” but more of a heavy texture. Question is, since it was a 9 inch pan I’m wondering if I should have cut down on the cooking time since it would have been thinner than it would have been in a 7 inch pan. Everyone said it was good lol the flavor was there but it was more of a rubbery cheesecake.

      Reply
      • Anna@CrunchyCreamySweet says

        January 29, 2019 at 2:54 pm

        Hi Ann! The cooking time was for 7" pan. Sounds like your cheesecake was overcooked. Also, always make sure not to overmix the batter, especially after adding eggs.

        Reply
        • Michelle says

          January 30, 2019 at 11:55 am

          I’m going to use an 8” pan...what would be a good cook time?

          Reply
          • Anna@CrunchyCreamySweet says

            January 30, 2019 at 1:01 pm

            Hi Michelle! I did not test this recipe using 8" pan. So sorry!

            Reply
          • Melody says

            February 01, 2019 at 7:02 pm

            Did you try this? I could only find an 8 inch pan and need advice!

            Reply
            • Anna@CrunchyCreamySweet says

              February 02, 2019 at 12:28 am

              Hi Melody! I shared a link in my post that leads to a great 7" pan on Amazon. Maybe try that? I do not have an 8qt IP so I have not tested this recipe in an 8" pan but I am searching for the answers. I will update this comment when I find them!

            • Ester Tomasette says

              August 11, 2020 at 10:13 am

              Yes, please give instructions on proportions and cooking time for an 8" pan using an 8 qt IP. Thanks!!

    43. Deborah says

      January 28, 2019 at 10:06 pm

      5 stars
      Mines in the IP wish me luck first try

      Reply
      • Anna@CrunchyCreamySweet says

        January 28, 2019 at 10:17 pm

        Yay! I am so excited for you! Let me know how you like the cheesecake, Deborah!

        Reply
    44. Janiece says

      January 25, 2019 at 11:17 pm

      Can I sub Greek yogurt for the sour cream? How about Stevia instead of sugar? Thanks.

      Reply
      • Anna@CrunchyCreamySweet says

        January 26, 2019 at 12:50 pm

        Hi Janiece! You can use Greek yogurt but I have not tested this recipe with Stevia.

        Reply
        • Donna says

          May 08, 2020 at 7:23 pm

          I use Stevia and it works great!

          Reply
    45. Carole says

      January 20, 2019 at 10:19 am

      I tried another recipe for NY Cheesecake that used cornstarch instead of flour, but everything else was the same as yours. The texture did not seem right though. I am thinking the flour instead of cornstarch will make the difference! Thank you!

      Reply
      • Anna@CrunchyCreamySweet says

        January 20, 2019 at 1:08 pm

        You are very welcome, Carole! Let me know how it goes!

        Reply
    46. Ann says

      January 18, 2019 at 6:40 pm

      5 stars
      This was so easy to make and was very delicious I’m making it again tonight for tomorrow 😋 thank you so much for the recipe 🙂

      Reply
      • Anna@CrunchyCreamySweet says

        January 20, 2019 at 1:11 pm

        Hi Ann! Yay! That's wonderful! I am so glad it was such a hit! Thank you!!

        Reply
    47. Martha says

      January 11, 2019 at 8:24 pm

      Did you prebake your graham crust? If so what temperature and for how long?

      Reply
      • Anna@CrunchyCreamySweet says

        January 12, 2019 at 1:13 am

        Hi Martha! No baking the crust is required. Just press to the bottom of the pan and freeze while you make the filling. I hope this helps!

        Reply
    48. Holly says

      December 23, 2018 at 8:27 am

      I have a 6 inch springform pan. What do I have to change to make this recipe ?

      Reply
      • Laura says

        January 20, 2019 at 8:44 am

        5 stars
        I added five minutes of cook time using a 6" pan, per comments on another recipe. It was perfect. It compensates for the extra thickness of the cheesecake.

        Reply
    49. Denise says

      December 03, 2018 at 11:16 am

      Do you cool it in the refrigerator still in the pan?

      Reply
      • Anna@CrunchyCreamySweet says

        December 03, 2018 at 12:48 pm

        Hi Denise! You can leave it in the pan, just make sure to run the knife around the edges to loosen them up. You can also take it out of the pan and place on a cake stand or plate, but that might take more space in the fridge. Hope this helps!

        Reply
    50. Erin says

      October 19, 2018 at 9:19 am

      5 stars
      This looks absolutely delicious! Yummy!

      Reply
    51. Kristen says

      October 18, 2018 at 7:59 am

      5 stars
      This is the most beautiful cheesecake ever!

      Reply
      • Anna@CrunchyCreamySweet says

        October 18, 2018 at 3:08 pm

        Thank you, Kristen!

        Reply
    52. Cheryl Sousan says

      October 18, 2018 at 7:47 am

      5 stars
      I'm going to pass this recipe along to my daughter at college - she loves her Instant Pot and is always looking for new recipes!

      Reply
      • Anna@CrunchyCreamySweet says

        October 18, 2018 at 3:08 pm

        Yay! I hope she loves it! Thank you, Cheryl!

        Reply
    53. Chrissie Baker says

      October 18, 2018 at 3:15 am

      5 stars
      Oh God, this cheesecake is incredibly beautiful !!! I bet those flavors are amazing! Cannot wait to try this! Love! Thank you for sharing this great recipe.

      Reply
      • Anna@CrunchyCreamySweet says

        October 18, 2018 at 3:09 pm

        Thank you so much, Chrissie! I hope you will get a chance to try this recipe.

        Reply
    54. Catalina says

      October 18, 2018 at 2:35 am

      5 stars
      This cheesecake is so decadent! I love how easy is to make it!

      Reply
      • Anna@CrunchyCreamySweet says

        October 18, 2018 at 3:10 pm

        Thank you, Catalina!

        Reply
    55. Dorothy says

      October 17, 2018 at 7:33 pm

      As much as I am loving my Instant Pot, I haven't made many desserts yet. This cheesecake looks like an excellent place to start!

      Reply
      • Anna@CrunchyCreamySweet says

        October 18, 2018 at 3:11 pm

        You have to try it, Dorothy! It's so easy and perfectly creamy!

        Reply
    56. Amanda says

      October 17, 2018 at 5:01 pm

      5 stars
      I love instant pot recipes and this being for cheesecakes makes it so much better!

      Reply
      • Anna@CrunchyCreamySweet says

        October 18, 2018 at 3:12 pm

        I agree! It's amazing! Thanks, Amanda!

        Reply
    57. Kara says

      October 17, 2018 at 2:11 pm

      5 stars
      Cheesecake in the Instant Pot? Sign me up! This looks simply divine!

      Reply
      • Anna@CrunchyCreamySweet says

        October 18, 2018 at 3:13 pm

        Right? It's crazy but so amazing! 😀 Thanks, Kara!

        Reply
    58. Emily Hill says

      October 17, 2018 at 1:32 pm

      5 stars
      I haven't tried cheesecake in my Instant Pot yet but I need to!

      Reply
      • Anna@CrunchyCreamySweet says

        October 18, 2018 at 3:13 pm

        YES! You have to try it, Emily!

        Reply
    59. Jessica says

      October 17, 2018 at 1:16 pm

      5 stars
      This is pure heaven! Thank you so much!

      Reply
      • Anna@CrunchyCreamySweet says

        October 18, 2018 at 3:15 pm

        Thank you, Jessica!

        Reply
    60. Aimee Shugarman says

      October 17, 2018 at 12:42 pm

      5 stars
      OMG this is quite seriously the easiest and best recipe for cherry cheesecake in the instant pot!!

      Reply
      • Anna@CrunchyCreamySweet says

        October 18, 2018 at 3:16 pm

        Thank you so much, Aimee!

        Reply

    Primary Sidebar

    Crunchy Creamy Sweet Anna

    Hi, I'm Anna! Thank you for stopping by! Here you will find easy and delicious recipes for busy people. My recipes are made with everyday ingredients and all of them are family approved!

    More about me →

    Easy Dinners

    • Square image of chicken in teriyaki sauce, rice and broccoli in a white bowl.
      Quick Teriyaki Chicken Rice Bowls Recipe
    • Asian chicken on rice.
      Easy Sesame Chicken Recipe
    • Square image of creamy garlic chicken in a skillet.
      Creamy Garlic Chicken
    • Lemon garlic chicken in a skillet.
      Creamy Lemon Garlic Chicken Recipe
    • Chicken in mushroom garlic sauce in pan.
      Creamy Mushroom Garlic Chicken
    • Beef noodle casserole in a baking dish.
      Cheesy Beef Noodle Casserole

    Popular Recipes

    • Cooked shrimp on a white plate.
      Air Fryer Shrimp
    • Square image of four Russet potatoes on a rack in the Instant Pot pressure cooker.
      Instant Pot Baked Potatoes Recipe
    • Noodles with peanut sauce and green onions in a white bowl with chopsticks.
      Thai Peanut Noodles Recipe
    • Square image of chicken nuggets with parsley on a white plate.
      Air Fryer Chicken Nuggets Recipe
    • BLT Pasta Salad in large glass bowl.
      BLT Pasta Salad Recipe
    • KFC Coleslaw in a white serving bowl.
      KFC Coleslaw Copycat Recipe

    Featured in

    Logos of publications like yahoo, Parade magazine, MSN.

    Footer

    ↑ back to top

    About

    • About Us
    • Privacy Policy
    • Accessibility Policy

    Newsletter

    • Sign Up! for emails and updates

    Contact

    • Contact

    As an Amazon Associate, I earn from qualifying purchases.

    Copyright © 2023 Crunchy Creamy Sweet All rights reserved.

    © Copyright 2023 - Crunchy Creamy Sweet - Privacy Policy